
The debate on the topic of photography can be a mixed bag. Some people don’t mind using a point-and-shoot camera for quick pictures such as those on a phone or some other compact camera. Although I agree that technology has improved greatly for these point-and-shoots where image quality is much better, enthusiasts would argue that that image quality produced by dSLRs and other “more expensive” setups is generally much better. This post here is not to debate which is better nor are we here to argue which camera brand is better, but to simply teach you the in’s and out’s of how to utilize the manual settings on a camera.
Before I begin babbling away, I would like to thank Lexie Machado for creating a superb online class for beginner photographers to learn how to use the exposure triangle on their cameras. You can check out the class here — Manual Mode: The Musical

Manual Mode: The Musical
— The world’s best derp drama, low-budget broadway comedy ever!
— Featuring Ali, Lewis, Colbie, Estella, and the mysterious Gear Guardian
— The Unenthused Participant, World Famous chef with 100% authentic French accent, Spunky Cowgirl, Guardian of the Forest, and Mysterious Gear Guardian go on a quest to photo a disappearing ghost
The Basics: Exposure Triangle
The 3 main concepts we are going to cover here are shutter speed, aperture, and ISO. All 3 settings deal with how your camera handles light, so keep that at the back of your mind. Although technically you can argue that you can change any one of these settings to let in the proper amount of light, each of these settings deals with different scenarios differently, so saying that you want more or less light simply by changing one setting is not a catch-all for all scenarios.
Shutter Speed
The easiest one to understand right off the bat is shutter speed. This value tells you how fast (or slow) your shutter in the camera opens and closes. The faster it opens and closes, the less light your camera lets into the sensor. The amount of light that reaches the sensor is directly proportional to the amount of time the shutter is opened and closed. For those nerds out there, it’s basically a linear graph. The main thing that shutter speed deals with is motion of the subject/object you are trying to capture.
For example, if your camera shows 1/100, the shutter is opened for a hundredth of a second before it closes. Comparatively, if we have 1/60 or 1/10, the shutter is opened for only a sixtieth of a second or a tenth of a second, which is slower than 1/100. This means there is more light let in for 1/60 and 1/10, respectively, compared to 1/100. If we assume all other settings are kept the same, the image for 1/100 would be darker compared to 1/60, and 1/60 would be darker than 1/10. Likewise, there are even slower settings like 1”, 10”, or 30” (i.e. 1 second, 10 seconds, 30 seconds). On the flip side, there are even faster shutter speeds like 1/1000, 1/4000, etc. Most modern dSLRs should have settings up to 30 seconds and up to 1/4000, but obviously the maximum slow and fast speeds depend on model designed by the manufacturer.
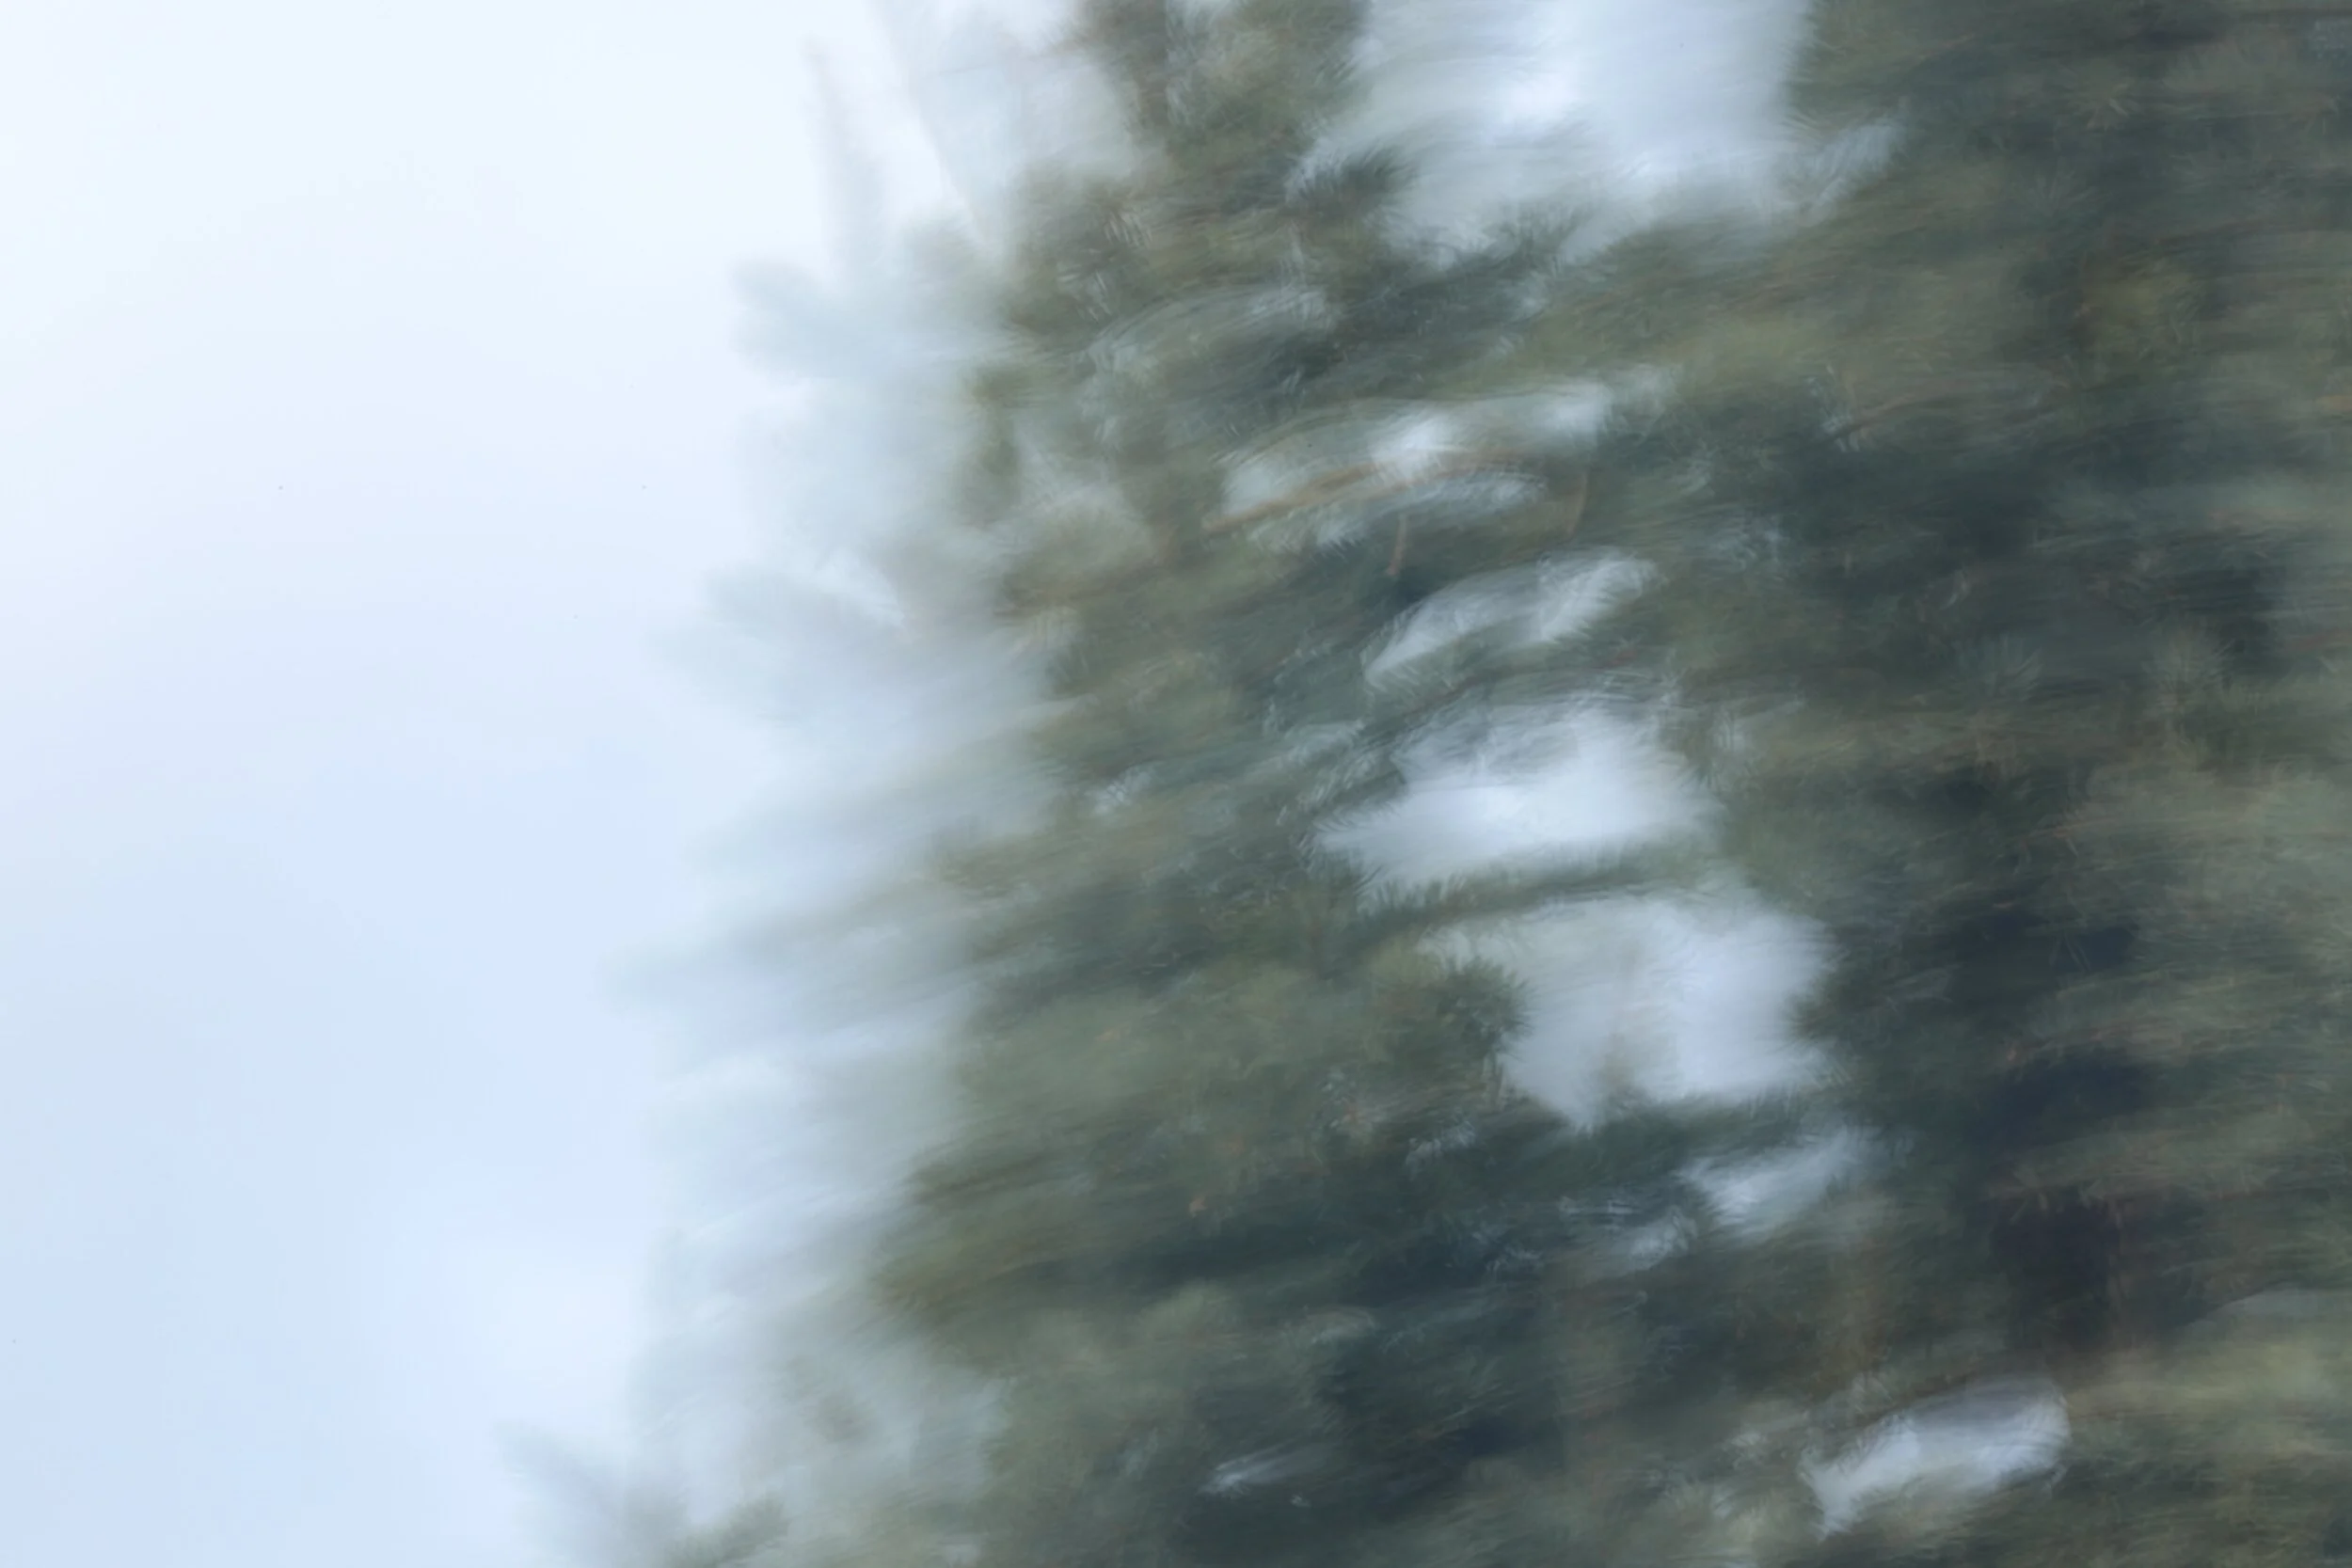
Here is a side-by-side comparison of a slow shutter speed vs. a quick shutter speed of a pine tree with the branches blowing in the wind, shown below:
Shutter Speed Example 1
1.3 second shutter speed
More light exposure
Blurry, little to no detail
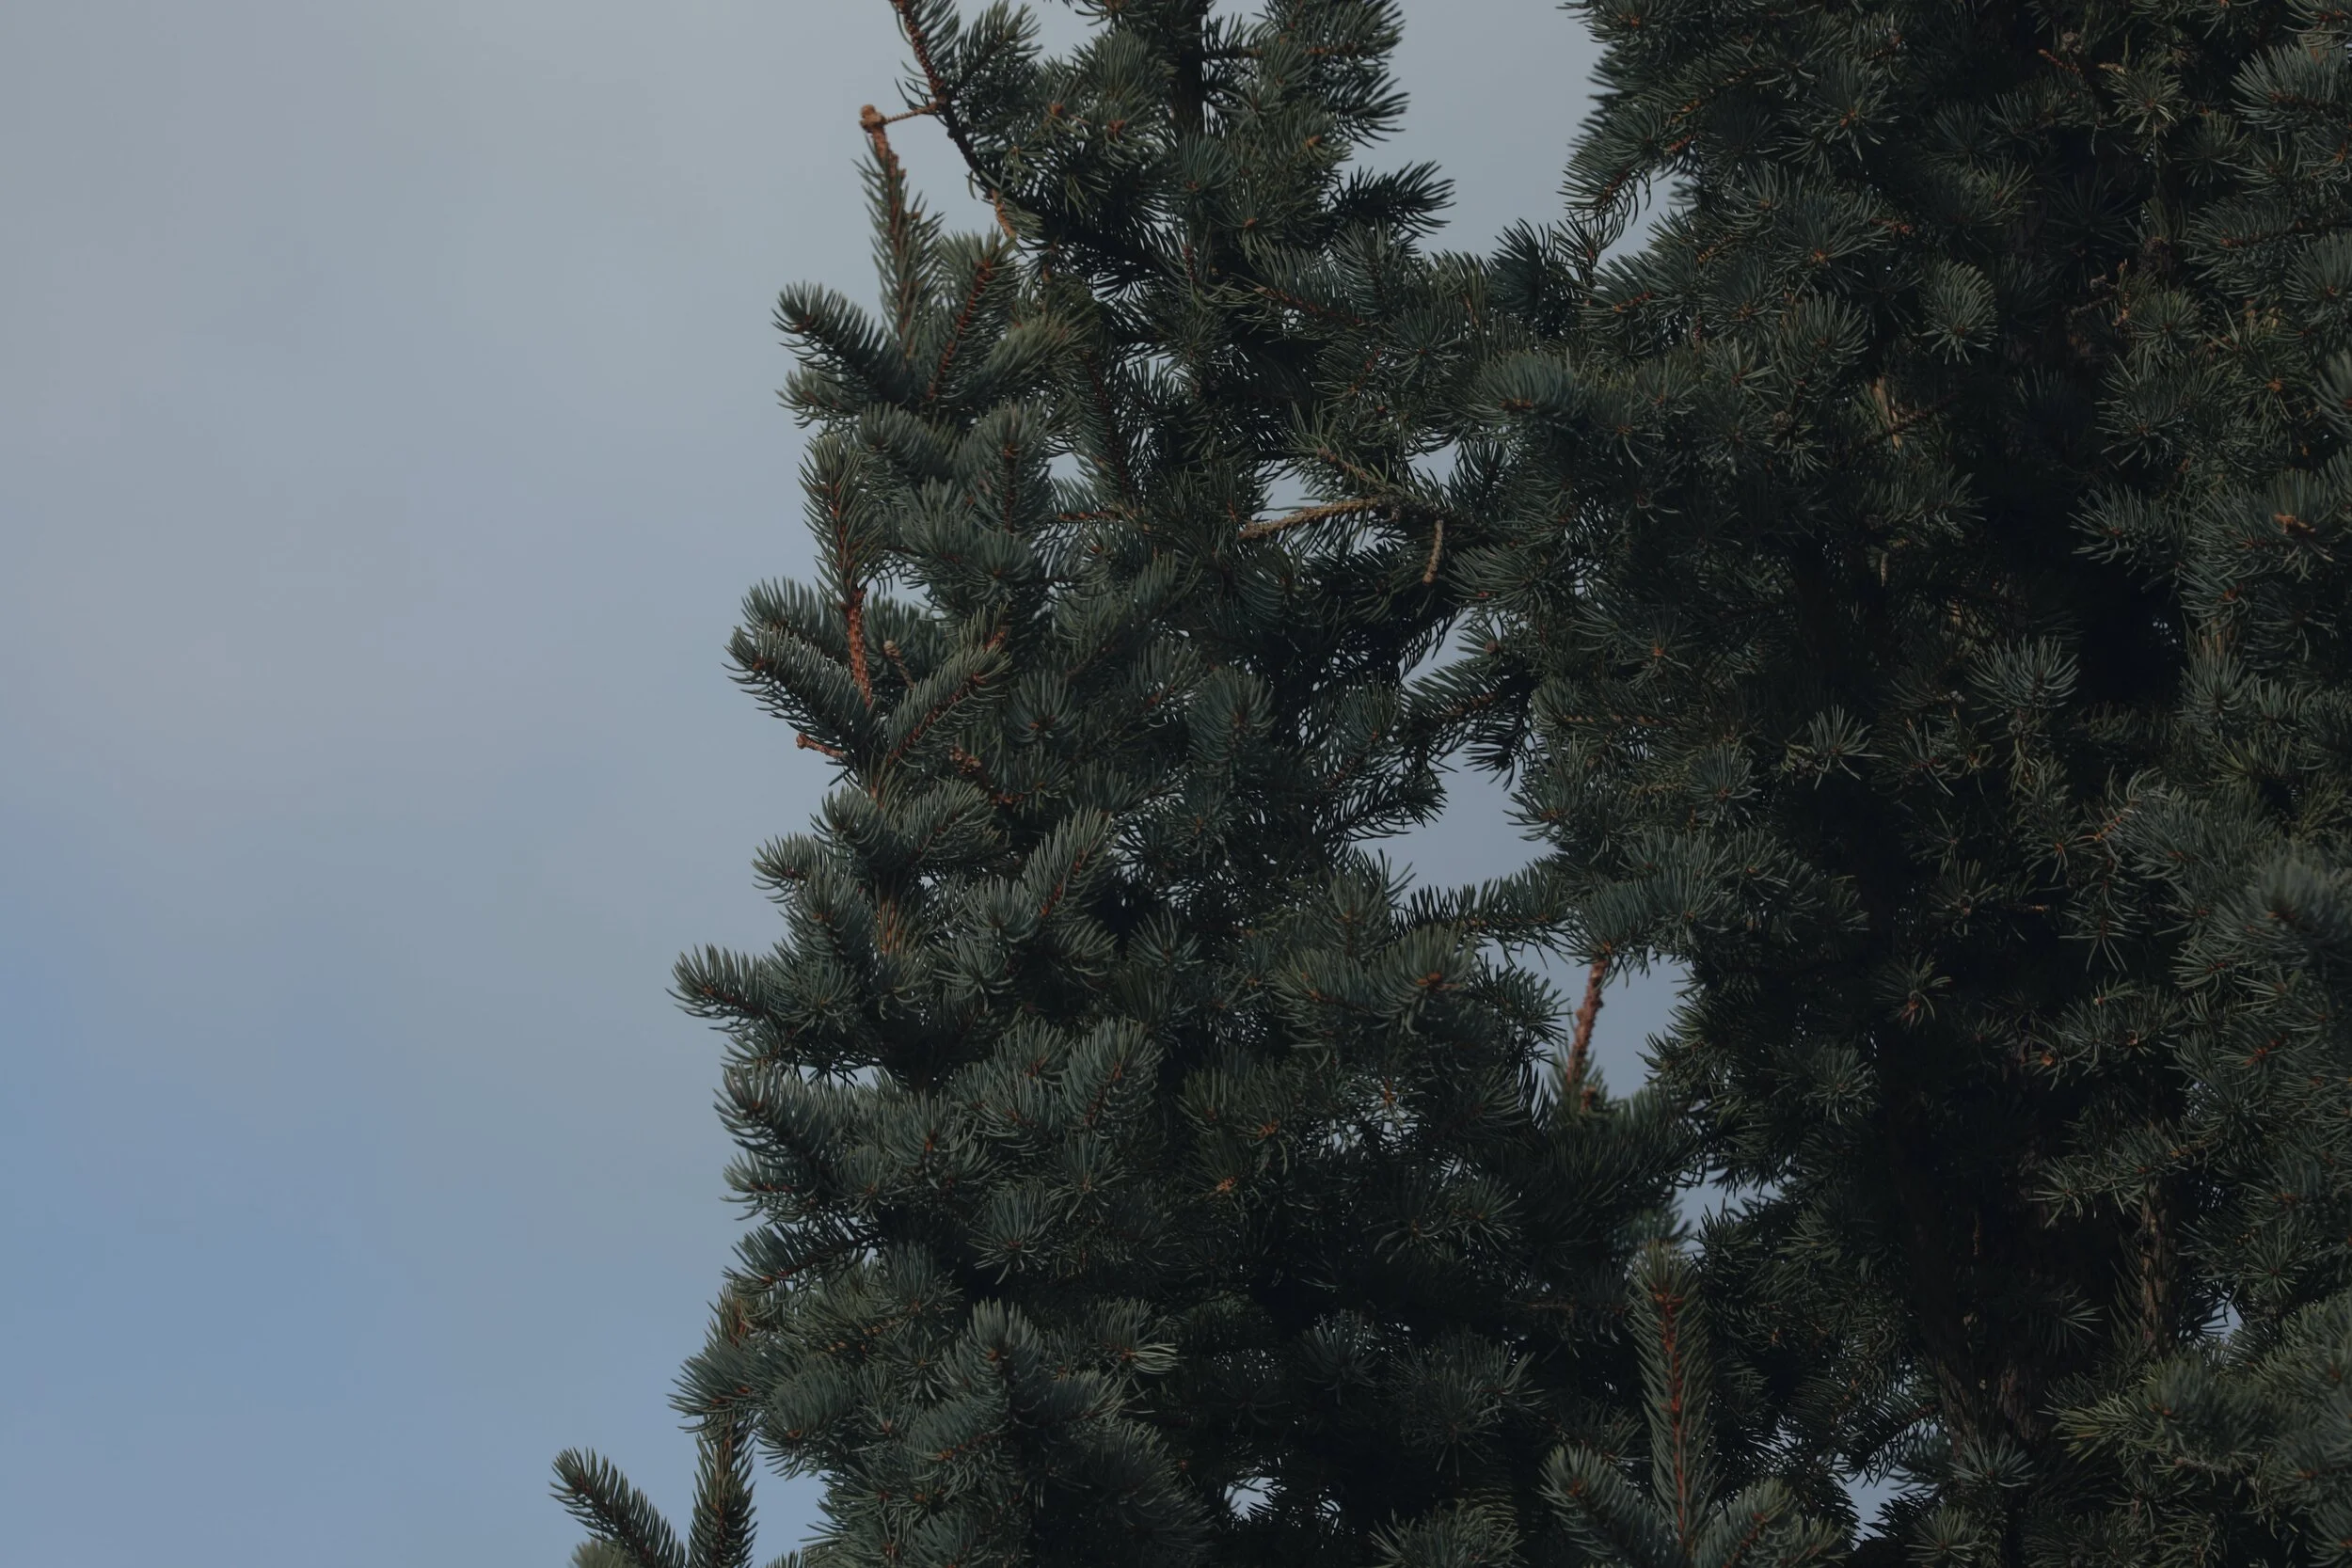
Shutter Speed Example 2
1/60 second shutter speed
Darker because quicker shutter speed
Sharper and more details, captures the action more
There is also a “BULB” setting on most modern cameras in which you can manually set how long you want your shutter open with an external shutter release. This is another topic on its own, so I won’t be getting into this here.
ISO Sensitivity
ISO deals with how sensitive your camera is to light. The lower the number, the darker the image. The higher the number, the more light your camera lets in. However, the catch to ISO is that with higher ISO numbers, there will be more grain to your photo. This means that if you take a closer look at your photos, you will see a lot of specks. So unless that’s the effect you are tying to achieve, the overall quality of your photo will degrade.
ISO Example 1
ISO 100
Darker
Better image quality (less grain; smoother)

ISO Example 2
ISO 25600
More light
Image quality degrades (more grain)
Aperture Size
Despite being the hardest concept to understand out of the 3 in the exposure triangle, aperture is still quite easy to understand. Aperture deals with the depth of field. The lower the number, the more shallow your depth of field is. That means your plane of focus from front to back is razor thin. Anything that is further away (front to back) from the subject that are you are focused on will be very blurred. If you have a higher number, then other objects that are placed at a distance (front to back) will start to become more in focus.
To help you understand this better, I have placed 2 subjects at different distances from the camera, with the focus point set to the subject on the right, as shown below for your visualization (subject on the left further back, subject on the right closer to camera). With the right subject in focus and the left subject out of focus, as you increase the aperture number, you will notice the left subject becoming more and more in focus, but the image will get darker.

Aperture Example 1
f2.0
More light
More background blur/bokeh
Subject in the back row is very blurred out

Aperture Example 2
f8.0
Darker
Less background blur/bokeh
Subject in the back row becomes more and more focused as number increases

Conclusion
In many cases, the first setting you would be changing in manual mode is the shutter speed, then utilizing aperture and ISO to compensate for the amount of light being let into your camera to expose your photo properly. The reason why I suggest setting shutter speed first is so that you can capture the moment properly, as motion blur is near impossible to fix in any post processing software without having to spend a large amount of time. For example, shooting high action subjects in sports and wildlife photography requires high shutter speed like 1/500 (or even quicker), while capturing waterfall and fireworks streaks will require 10 seconds. It all depends on the effect you are going after. Once shutter speed is set, you can set aperture to a low number to get a artistic bokeh and depth-of-field effect or a higher number for a “flatter” photo with more subjects in focus. Then, you can finish it off by adjusting ISO to compensate for the over/under exposure. However, if image quality is a #1 priority for you, you will need to figure out your tolerance level for the grainy-ness produced by high ISO and adjust the other settings accordingly. Either way, you will have to pick 1 of 3 settings as your top priority for that specific scenario and adjust the other settings to your liking.
Needless to say, practice makes perfect. Don’t be afraid to experiment or make mistakes. Photography is an art and takes time to master. So start shooting away!